This template will get you set up using ROS2 with VSCode as your IDE.
The development environment is set up using a VSCode devcontainer, and the same configuration is also used in CI.
The devcontainer uses the Microsoft Ubuntu devcontainer image along with the ROS2 devcontainer feature.
If you want to change which version of ROS you're using, update the ROS2 feature in .devcontainer/devcontainer.json:
This is also the ROS version used in CI, so you only need to change it in one place.
ROS2-approved formatters are included in the IDE.
- c++ uncrustify; config from
ament_uncrustify - python autopep8; vscode settings consistent with the style guide
There are many pre-defined tasks, see .vscode/tasks.json for a complete listing. Feel free to adjust them to suit your needs.
Take a look at how I develop using tasks for an idea of how I use tasks in my development.
This template sets up debugging for python files, gdb for cpp programs, and ROS launch files.
See .vscode/launch.json for configuration details.
The template also comes with basic continuous integration set up. See .github/workflows/ros.yaml.
The build, test, and lint jobs run using the same devcontainer configuration used for development. This means changing the ROS distro in .devcontainer/devcontainer.json also changes the version used by CI.
To remove a linter, just delete its name from the matrix:
matrix:
linter:
- cppcheck
- cpplint
- uncrustify
- lint_cmake
- xmllint
- flake8
- pep257You should already have Docker and VSCode with the Dev Containers extension installed on your system.
If you're using Windows, I recommend using WSL2 and opening the repository from your WSL distro before reopening it in the container.
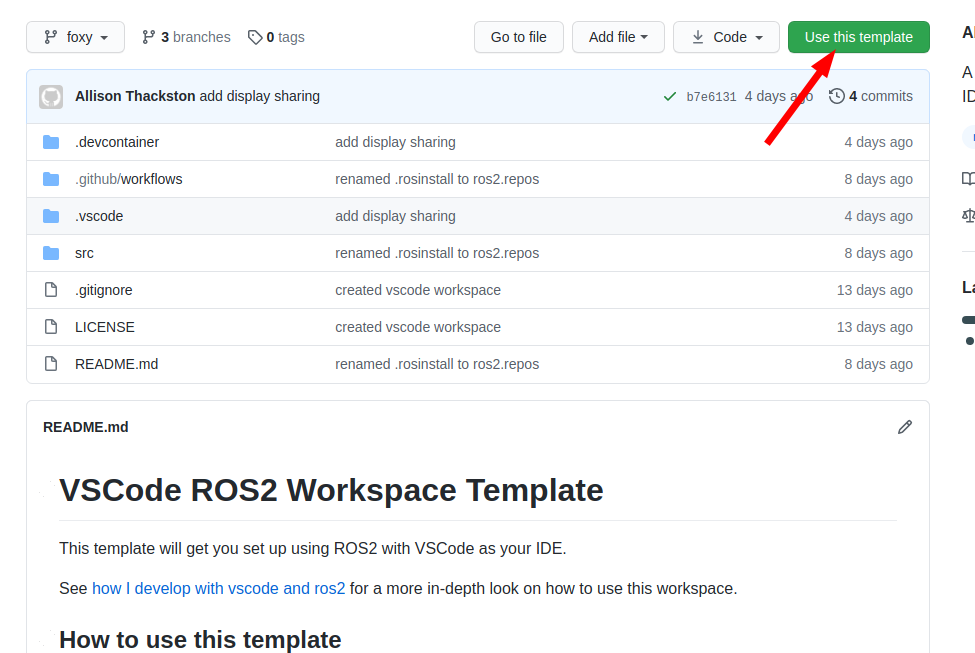
Click on Use this template.
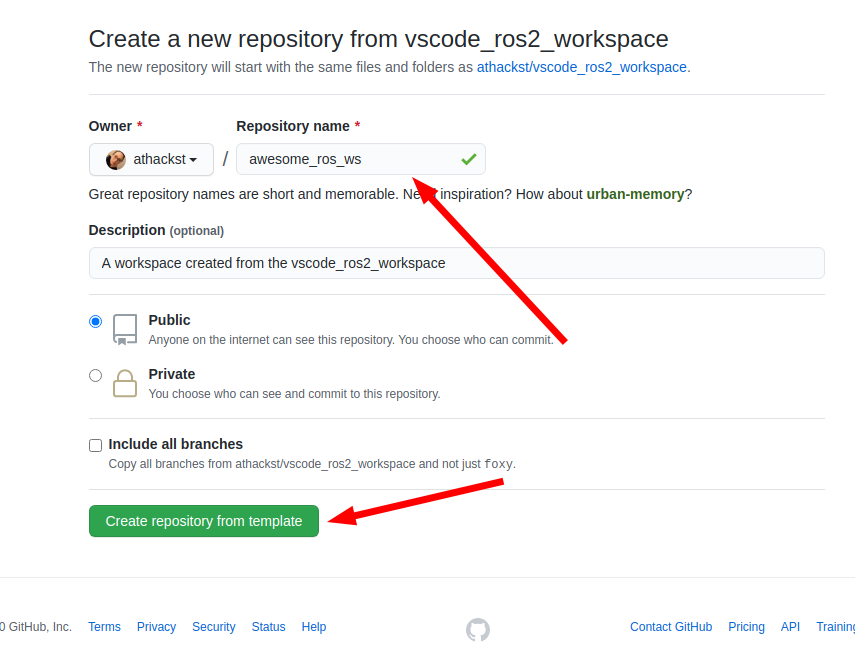
On the next dialog, name the repository you would like to start and choose its visibility.
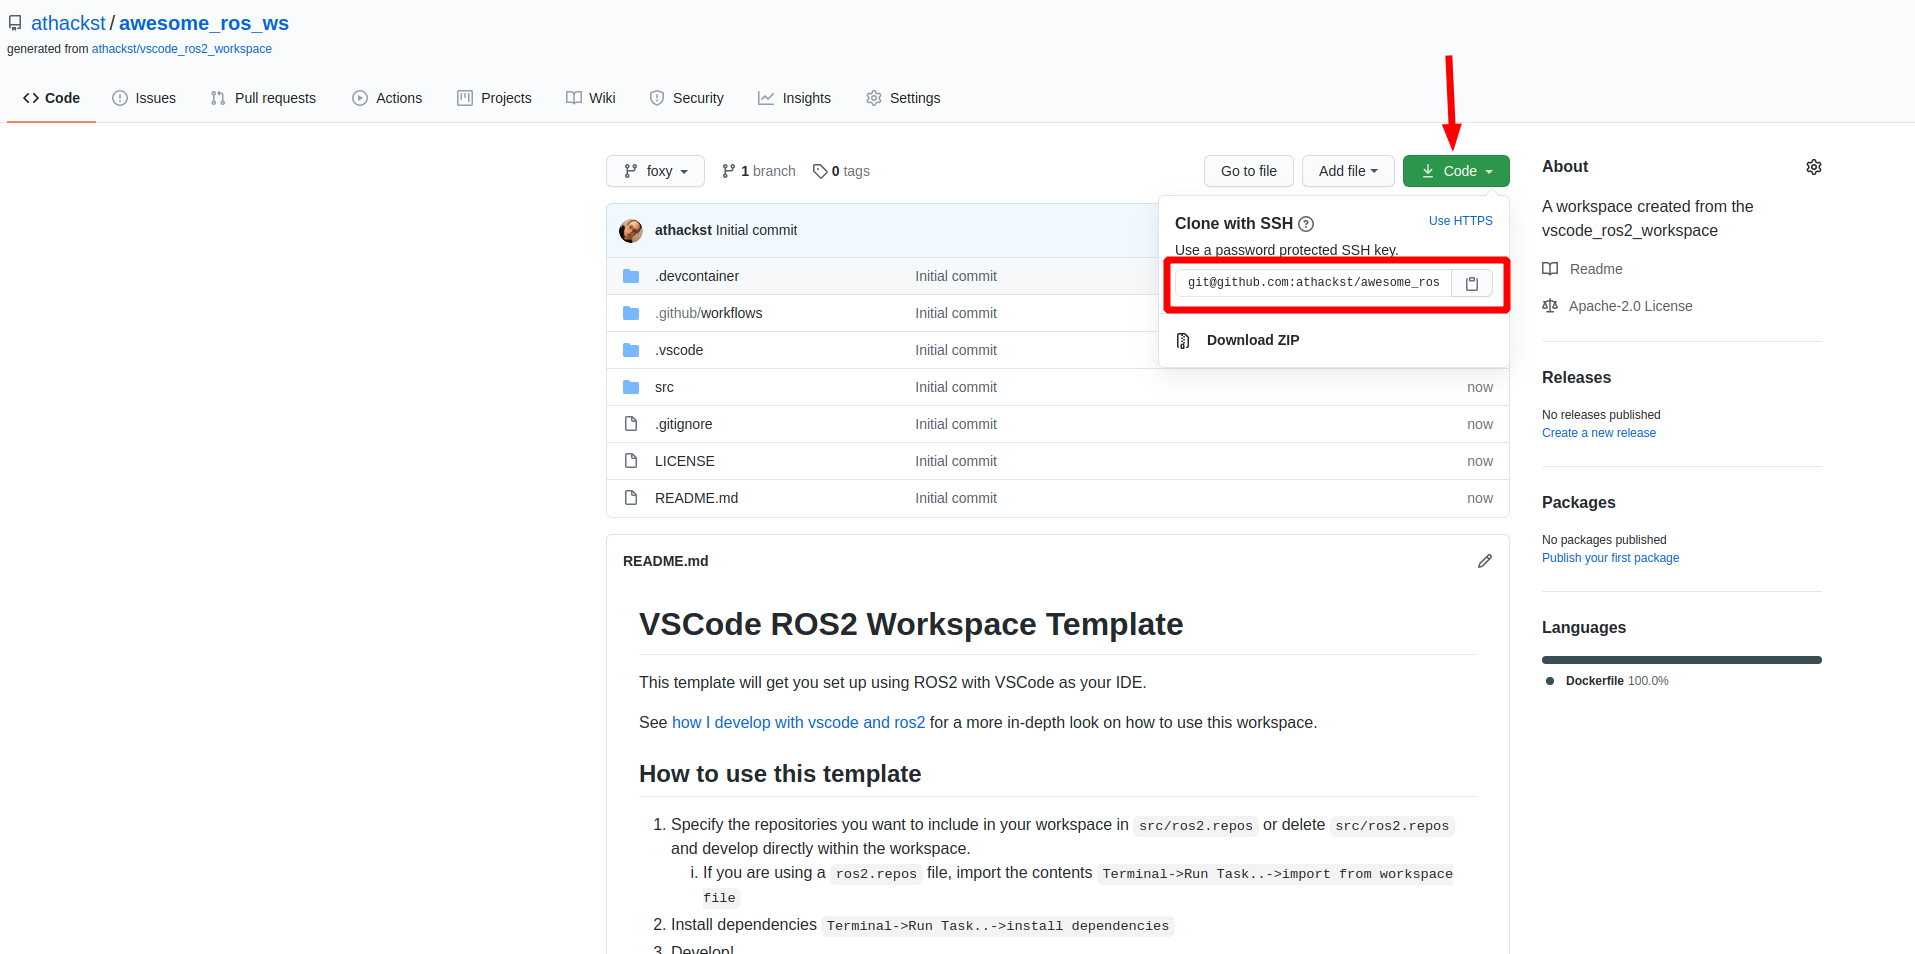
Github will then create a new repository with the contents of this one in your account. It grabs the latest changes as the initial commit.
Now you can clone your repo as normal.
Now that you've cloned your repo onto your computer, open it in VSCode (File -> Open Folder).
When you open it for the first time, you should see a popup asking if you would like to reopen it in a container. Say yes!
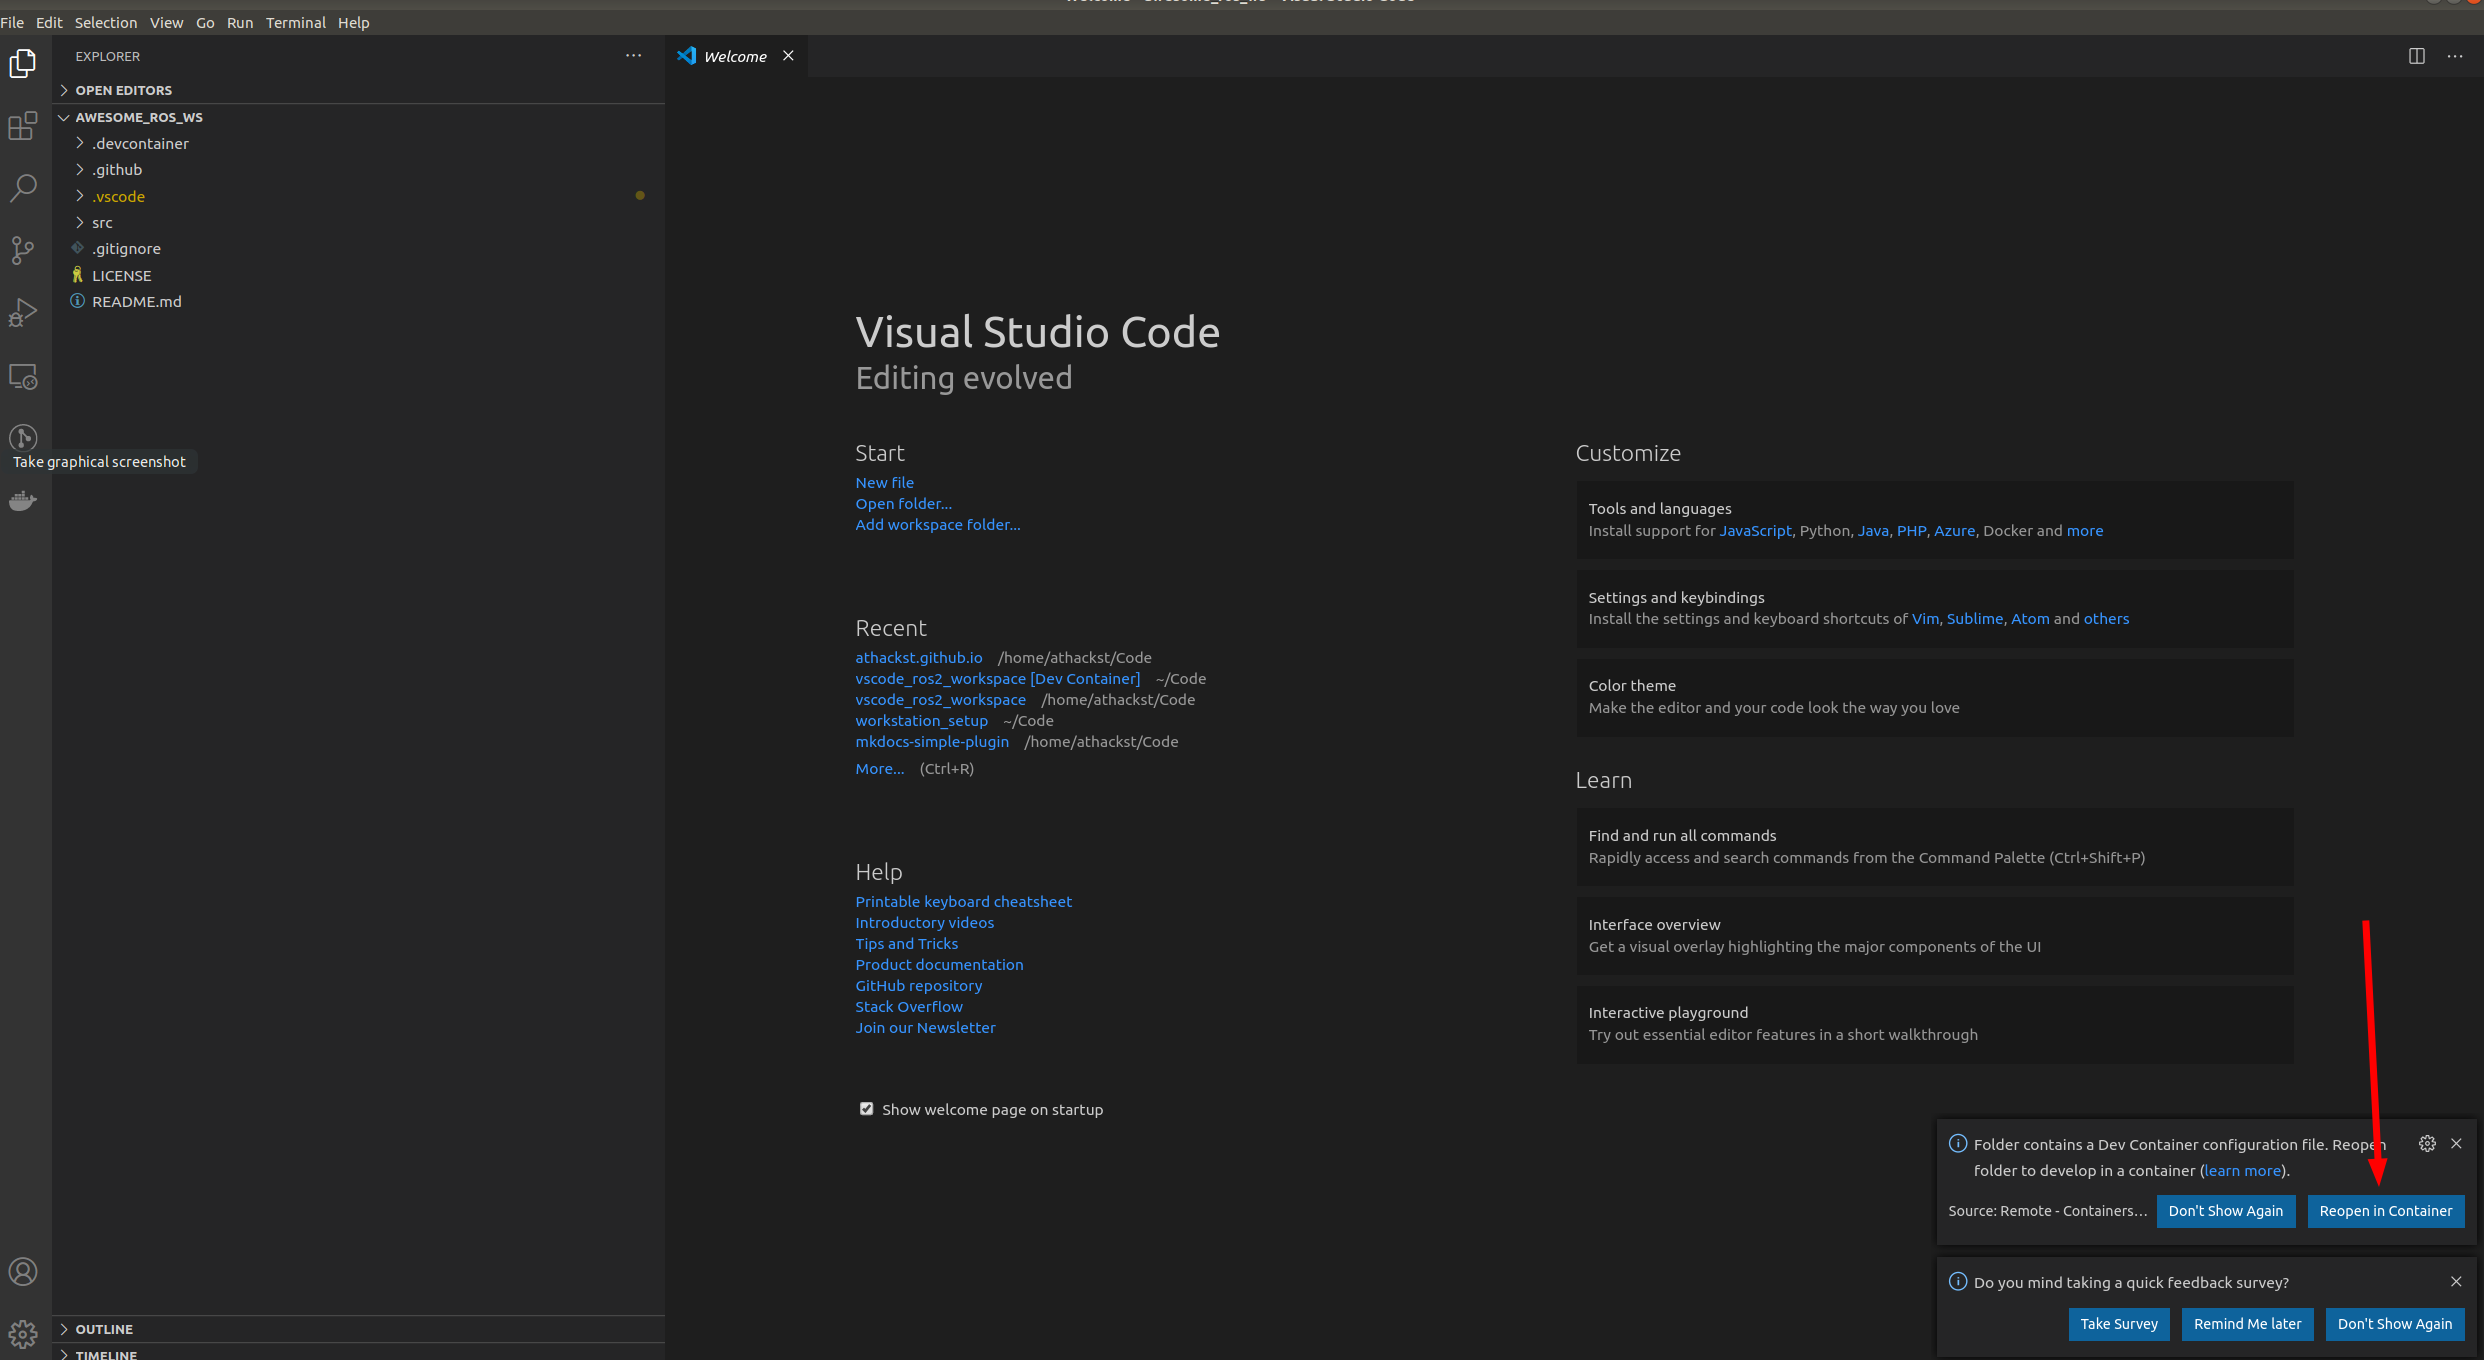
If you don't see the popup, open the command palette and select:
Dev Containers: Reopen in Container
VSCode will set up the container from .devcontainer/devcontainer.json, install ROS2 and the configured development tools, and install the recommended VSCode extensions.
Once that's finished, open a terminal inside VSCode and you're ready to go.
-
Specify the repositories you want to include in your workspace in
src/ros2.repos, or deletesrc/ros2.reposand develop directly within the workspace. -
If you are using a
ros2.reposfile, import the contents withTerminal -> Run Task... -> import from workspace file. -
Install dependencies with
Terminal -> Run Task... -> install dependencies. -
Adjust the scripts to your liking. These scripts are used both within tasks and CI.
setup.sh- setup commands for your code. By default this imports the workspace and installs dependencies.build.sh- build commands for your code. By default this uses--merge-installand--symlink-install.test.sh- test commands for your code.
-
Develop!
The ROS distro is selected by the ROS2 feature in .devcontainer/devcontainer.json:
"ghcr.io/althack/devcontainers/ros2:0": {
  "distro": "lyrical",
  "package": "desktop"
}Change distro to the version you want to use and rebuild the container.
Since CI uses the same devcontainer configuration, you don't need to update the ROS distro anywhere else.
If you're using Windows, open the repository from your WSL2 distro and then reopen it in the devcontainer.
Current versions of VSCode Dev Containers and WSLg handle the display forwarding for you, so you shouldn't need to manually configure DISPLAY, Wayland, PulseAudio, or /mnt/wslg mounts.
If you're using native Linux with X11, uncomment the X11 forwarding feature in .devcontainer/devcontainer.json:
"ghcr.io/althack/devcontainers/linux-x11-forwarding:0": {},Some GUI applications may also need the container to share the host IPC namespace. If you run into rendering problems, try uncommenting:
"--ipc=host"in runArgs.
CUDA support is optional.
If you want to use CUDA, uncomment the NVIDIA CUDA feature in .devcontainer/devcontainer.json:
"ghcr.io/devcontainers/features/nvidia-cuda:3": {
  "installToolkit": true
}
and allow the container to access the host GPU:
"--gpus",
"all"
You'll also need working NVIDIA drivers and the NVIDIA Container Toolkit installed on the host.
See the NVIDIA Container Toolkit installation guide for setup instructions.
I don't test all of the possible NVIDIA/CUDA host configurations, so your mileage may vary here.
VSCode doesn't necessarily know about repositories you've imported underneath the workspace.
You can add them directly using:
File -> Add Folder To Workspace

Or you can add them as git submodules.

To add all of the repos in your *.repos file as submodules, run:
python3 .devcontainer/repos_to_submodules.pyor run the task titled:
add submodules from .repos